At first I use to painstakingly wrap up each item in bubble wrap then tissue paper then in brown paper - This use to take forever! It didn't look very appealing too, it just looked like a plain parcel - Not too exciting when it comes peeping through your letter box! So I set about finding a more exciting way of wrapping them up. Firstly I bought some little sweet shop gift bags (you know the kind, stripy bright colours?) but this ended up getting expensive and the paper was super thin and fragile - but it did save a lot of time on packaging. So I contiuned searching wanting some Polkadot ones to fit with my brand but alas no luck! Then I had a genius idea of making my own! I found a template on the internet and here it is...
I print out about 100 of these each time (in draft mode to save on ink!) on to a4 plain paper. I then create a Polkadot Pattern and print to borderless a4 on the reverse of the template sheets!
Printing full page colour does use a lot of ink though! So to save I always turn down the saturation to pastel tones, print as draft, and try to vary the colours you print (i tend to do 25 of each, so you don't use ALL the blue ink, and have loads of yellow & red left)
I then snip off the two corner sections, fold & glue together!
This does take a lot of time but I really think it's worth it for all the feedback from my customers I get saying how much they loved recieving it through the post, like a proper gift!
I still wrap all my items in bubble wrap, and tissue paper (shop around for some pretty patterns and not just plain!) and I also make my own cardboard pillow boxes for protection!
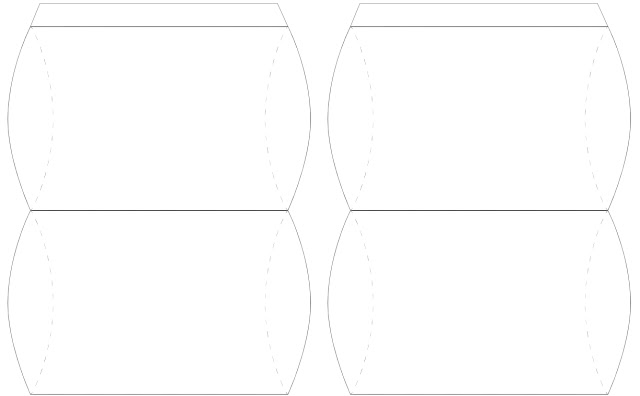
Heres my template for the pillow boxes...
It's the same again with them.. Print the outline on the back of the card and your pattern on the front, cut around the lines and score the inner lines.
I personally love making my own packaging. It's really helped me establish a look for my products with matching business cards, order cards, stickers, earrings etc. It also means I can show a bit of personality to my customers and give them something a bit more special than the rest!
 | |
| My special edition olympics packaging! |


No comments:
Post a Comment